


alex
-
Posts
358 -
Joined
-
Last visited
-
Days Won
18
Content Type
Profiles
Forums
Downloads
Everything posted by alex
-
 Salut, Vreau să vă prezint un proiect la care lucrez: SEO Force AI - un plugin WordPress care generează automat SEO complet pentru produsele din WooCommerce, folosind inteligență artificială. Ce face concret: - Generează automat titlul SEO, meta descrierea, focus keyword-ul, slug-ul URL-ului - Injectează headinguri H2/H3 optimizate în descrierea produsului - Generează alt text pentru imaginile produsului - Scoruri reale de 90+ în Rank Math sau Yoast SEO, fără nicio editare manuală Cum funcționează: Se conectează la AI-ul ales de tine (Claude, DeepSeek, OpenAI, Gemini sau Mistral - cu cheia ta de API), și scrie totul automat. Există 4 moduri de generare: automat la publicarea produsului, direct din editorul de produs, din lista de produse, sau bulk pentru tot catalogul existent. Există în două variante dedicate: una integrată nativ cu Rank Math, alta cu Yoast SEO - fiecare cu suport complet pentru câmpurile specifice ale pluginului de SEO respectiv. Pentru cine e util: proprietari de magazine WooCommerce cu multe produse, unde scrierea manuală de SEO pentru fiecare produs în parte devine consumatoare de timp. Demo video (5 minute): https://youtu.be/j967ZIrKHZM Există și o versiune gratuită de testare: https://euro-hosting.net/seo-force-ai/ Documentație completă: https://euro-hosting.net/seo-force-ai-documentation/ Aștept cu interes păreri și întrebări!
-
Salut! Înțeleg exact frustrarea — documentația seacă și tutorialele fără direcție sunt un coșmar când ești la început. Recomandarea principală: „100 Days of Code" (Angela Yu, Udemy) E un curs 100% project-based — construiești ceva nou în fiecare zi, de la jocuri simple până la automatizare și aplicații web. Structura seamănă cu un sistem de quest-uri: fiecare zi = un proiect mic, un obiectiv clar, feedback imediat. Prețul e ~15–20€ la reducerile Udemy. → 100 Days of Code pe Udemy Alternativă gratuită: Codecademy – Learn Python 3 Funcționează similar cu Duolingo — exerciții interactive în loc de prelegeri pasive. Bun ca punct de pornire înainte să investești bani. → Learn Python 3 pe Codecademy Pentru Pygame specific: Tech With Tim (YouTube) Serii dedicate Pygame structurate ca mini-proiecte (Snake, Space Invaders, platformere) — exact logica unui skill tree. → Tech With Tim pe YouTube Ordinea recomandată: Codecademy gratuit (2–3 săptămâni) — sintaxă de bază 100 Days of Code — proiecte reale + automatizare Excel/CSV Tech With Tim — Pygame și game dev Evită să cauți „cursul perfect" la nesfârșit — tutorial hell e real. Alege unul și du-l până la capăt. Succes!
-
Bine ai venit!
-
Salut, de acord, ti-am creat adminul pe steamid
-
Pro si de la mine, iti fac acum adminul
-
🔥 1. Creezi scriptul universal anti-flood sudo nano /usr/local/bin/flood_guard_universal.sh Lipești: #!/usr/bin/env bash UDP_THRESHOLD=200 TCP_THRESHOLD=150 INTERFACE=$(ip route get 1 | awk '{print $5; exit}') LOGFILE="/var/log/flood_guard_universal.log" echo "[START] Universal Flood Guard pornit pe interfata $INTERFACE" | tee -a "$LOGFILE" # -U = Unbuffered output (important!) sudo tcpdump -U -i "$INTERFACE" -nn -l 2>/dev/null \ | awk -v udp_threshold="$UDP_THRESHOLD" \ -v tcp_threshold="$TCP_THRESHOLD" \ -v logfile="$LOGFILE" ' { now = systime() # extrage IP sursa ip = $3 sub(/\.[0-9]+:$/, "", ip) # UDP sau TCP? if ($0 ~ /UDP/) { udp_count[ip]++ } else if ($0 ~ /TCP/) { tcp_count[ip]++ } # verificare pe secunde if (last_time != now) { # UDP flood for (i in udp_count) { if (udp_count > udp_threshold) { print "[BAN] UDP Flood de la " i " cu " udp_count " pachete/sec" | tee -a logfile system("iptables -A INPUT -s " i " -j DROP") } delete udp_count } # TCP flood for (i in tcp_count) { if (tcp_count > tcp_threshold) { print "[BAN] TCP Flood de la " i " cu " tcp_count " pachete/sec" | tee -a logfile system("iptables -A INPUT -s " i " -j DROP") } delete tcp_count } last_time = now } }' Salvezi: CTRL+O → Enter → CTRL+X 🔥 2. Permisiuni și executabil sudo chmod +x /usr/local/bin/flood_guard_universal.sh 🔥 3. Creezi serviciul systemd sudo nano /etc/systemd/system/flood_guard.service Lipești: [Unit] Description=Universal Flood Guard for CS and VPS After=network.target [Service] Type=simple ExecStart=/usr/local/bin/flood_guard_universal.sh Restart=always RestartSec=3 StandardOutput=append:/var/log/flood_guard_universal.log StandardError=append:/var/log/flood_guard_universal.log [Install] WantedBy=multi-user.target Salvezi. 🔥 4. Activezi serviciul sudo systemctl daemon-reload sudo systemctl enable flood_guard.service sudo systemctl start flood_guard.service 🔥 5. Verifici dacă rulează sudo systemctl status flood_guard.service Ar trebui să vezi active (running). 🔥 6. Vezi atacurile și IP-urile blocate sudo tail -f /var/log/flood_guard_universal.log Când apare flood, vei vedea instant: [BAN] UDP Flood de la 170.64.137.95 cu 840 pachete/sec [BAN] TCP Flood de la 128.1.40.110 cu 367 pachete/sec 🔥 Gata, de acum ești protejat 24/7 Flood-ul nu te mai lasă fără SSH. Serverul cs1.6 nu mai intră în frame-uri. Nu mai pierzi jucători. Nu mai ai lag.
-
- 2
-

-
Bine ai venit !
-
Bine ai venit!
-
Aprobat
-
acceptat, da-mi mesaj pe privat cu steamid sau user si parola pentru admin
-
Aprobat, Grad Elf
-
Overview This plugin replaces the standard white smoke grenades with colorful smoke effects in Counter-Strike 1.6. It adds visual variety to the game by allowing smoke grenades to produce smoke in different colors - either randomly or based on team affiliation. Plugin Information Name: Colored Smoke Grenades Version: 1.2 Author: steams.ro Original Concept: xPaw Game: Counter-Strike 1.6 Required Modules: engine, fakemeta Features 🎨 Six vibrant smoke colors: Yellow Red Blue Green Magenta Orange 🎯 Three operating modes: Disabled (standard white smoke) Random colors Team-based colors (T=Red, CT=Blue, Spectators=Green) ⚙️ Realistic physics: Grenades bounce realistically on surfaces Bounce sound effects Proper gravity and friction simulation Auto-removal after 21.5 seconds Installation Step 1: Required Files Make sure you have the following sprite files in your server: cstrike/sprites/gas_puff_01y.spr (Yellow) cstrike/sprites/gas_puff_01r.spr (Red) cstrike/sprites/gas_puff_01b.spr (Blue) cstrike/sprites/gas_puff_01g.spr (Green) cstrike/sprites/gas_puff_01m.spr (Magenta) cstrike/sprites/gas_puff_01o.spr (Orange) Step 2: Plugin Installation Place colored_smoke.sma in addons/amxmodx/scripting/ Compile the plugin using AMX Mod X compiler Move compiled colored_smoke.amxx to addons/amxmodx/plugins/ Add colored_smoke.amxx to your plugins.ini file Restart server or change map Step 3: Configuration Add to your amxx.cfg or server.cfg: sv_colored_smoke 1 // Enable with random colors Configuration Console Variable (CVar) sv_colored_smoke <mode> Mode Description Effect 0 Disabled Standard white smoke (plugin inactive) 1 Random Colors Each smoke grenade gets a random color 2 Team-Based Colors Terrorist=Red, Counter-Terrorist=Blue, Spectators=Green Examples Enable random colored smoke: sv_colored_smoke 1 Enable team-based colored smoke: sv_colored_smoke 2 Disable plugin (use default smoke): sv_colored_smoke 0 How It Works Technical Process Interception: Plugin detects when a smoke grenade explodes (via weapons/sg_explode.wav sound) Entity Removal: Original smoke entity is moved off-map and flagged for removal Custom Entity: New entity is created with custom properties Physics Application: Entity receives random velocity for realistic bounce Color Assignment: Smoke color is determined based on current mode Visual Effects: Two-layer smoke effect is created for depth Ground Effect: Small smoke puffs appear when grenade settles Auto-Cleanup: Entity is automatically removed after 21.5 seconds Smoke Effect Layers The plugin creates a dual-layer smoke effect: Main Cloud: Large smoke cloud (100 units radius) centered 50 units above ground Secondary Layer: Wider diffusion effect (150 units radius) for visual depth Ground Smoke: Small smoke puffs (2 units radius) when grenade is stationary Color Distribution Random Mode (sv_colored_smoke 1) Each smoke grenade randomly selects from all 6 available colors with equal probability. Team-Based Mode (sv_colored_smoke 2) Team Color Sprite Terrorist Red gas_puff_01r.spr Counter-Terrorist Blue gas_puff_01b.spr Spectator Green gas_puff_01g.spr Performance Impact CPU Usage: Minimal (< 1% on modern hardware) Network Traffic: Slightly increased due to additional temp entities Memory Usage: Negligible (~50KB for sprite precaching) FPS Impact: None for most clients Server Performance: No noticeable impact Optimization Features Uses efficient Fakemeta natives (pev, set_pev) Proper entity cleanup prevents memory leaks Sprites are precached only once at map start Minimal forward hook overhead Compatibility ✅ Compatible with: AMX Mod X 1.8.2 or higher Metamod 1.21 or higher Counter-Strike 1.6 (all builds) Windows and Linux servers All game modes (Classic, Deathmatch, etc.) ⚠️ May conflict with: Other smoke modification plugins Plugins that hook FM_EmitSound for smoke grenades Custom smoke sprite replacements Troubleshooting Smoke appears white (not colored) Cause: Missing colored sprite files Solution: Download and install all 6 colored sprite files in the correct directory Plugin not working Cause: CVar set to 0 or plugin not loaded Solution: sv_colored_smoke 1 amx_plugins // Check if plugin is loaded Smoke grenades disappear instantly Cause: Entity limit reached or conflicting plugin Solution: Increase sv_maxents value Check for conflicting plugins with amx_plugins Colors don't match teams in team-based mode Cause: Plugin uses internal team IDs Solution: This is expected behavior; team colors are: Team 1 (T) = Red Team 2 (CT) = Blue Team 3 (Spec) = Green Use Cases 1. Visual Enhancement Add visual variety to standard gameplay without affecting balance. 2. Team Identification Use team-based mode to help players quickly identify which team threw a smoke. 3. Event Servers Create colorful and fun atmosphere for community events and casual play. 4. Training Servers Use colored smokes to mark different areas or strategies during practice sessions. 5. Fun Servers Enhance the visual appeal of fun/mod servers with random colored effects. Commands This plugin has no player commands. All configuration is done via server CVars. Admin Commands None required. Configuration is automatic based on CVar settings. Known Limitations Sprite Requirement: Requires custom sprite files (not included with default CS 1.6) Client Download: Clients must download sprite files on first connect No Mid-Air Color Change: Color is determined at explosion, not while grenade is in flight Team Color Override: In team mode, player cannot choose custom colors Changelog Version 1.2 (Current - steams.ro) Complete code refactoring and optimization Switched to modern Fakemeta natives (pev, set_pev) Added proper enums for colors and modes Improved entity validation Better code organization and comments Separated smoke effect creation into dedicated function Enhanced error handling Updated to modern AMXX coding standards Author credit updated to steams.ro Version 1.1 (xPaw) Fixed team-based color assignment Improved bounce physics Added ground smoke effect Version 1.0 (xPaw) Initial release Basic colored smoke functionality Random and team-based modes FAQ Q: Do clients need to download anything? A: Yes, clients will automatically download the 6 colored sprite files on first connect (if FastDL is configured). Q: Does this affect gameplay or provide any advantage? A: No, this is purely cosmetic. Smoke blocks vision equally regardless of color. Q: Can I add custom colors? A: Yes, you can add custom sprites and modify the plugin source code to include them. Q: Will this work with custom smoke mods? A: It may conflict with other smoke modification plugins. Test compatibility carefully. Q: Does this increase server lag? A: No, the performance impact is negligible on modern servers. Q: Can individual players choose colors? A: Not in the current version. Colors are determined by server settings. Support & Credits Support Website: steams.ro Community: AMX Mod X forums Issues: Report bugs through appropriate channels Credits Original Plugin: xPaw Optimization & Update: steams.ro Community: AMX Mod X developers and testers Special Thanks xPaw for the original colored smoke concept AMX Mod X development team Counter-Strike modding community License This plugin is free to use and modify for personal and commercial servers. Please maintain author credits when redistributing or modifying. Redistribution Terms Keep original author credits (xPaw) Keep updated version credits (steams.ro) Provide source code if distributing compiled version Don't claim original authorship Additional Resources Sprite Creation If you want to create custom colored sprites: Use Sprite Viewer/Creator tools Base your sprites on the original gas_puff_01.spr Modify the color palette Save with appropriate naming convention Performance Monitoring Monitor plugin performance with: amx_plugins // Check if plugin is active stats // View server performance Version History Summary Version Date Author Key Changes 1.0 Original xPaw Initial release 1.1 Update xPaw Physics improvements 1.2 2024 steams.ro Complete optimization Thank you for using Colored Smoke Grenades! 🎨💨 For questions, suggestions, or bug reports, visit steams.ro or the AMX Mod X community forums. ColoredSmoke.amxx ColoredSmoke.sma sprites.zip
-
Overview The Show IP plugin provides administrators with a convenient way to view player IP addresses directly from the game console. This is useful for server management, detecting ban evaders, and monitoring player connections. Plugin Information Name: Show IP Version: 1.1 Author: steams.ro Required Access: ADMIN_KICK flag Installation Place showip.sma in your AMX Mod X scripting folder (addons/amxmodx/scripting/) Compile the plugin using the AMX Mod X compiler Move the compiled showip.amxx file to addons/amxmodx/plugins/ Add showip.amxx to your plugins.ini file Restart the server or change the map Commands Main Command amx_ip <target> Usage Examples 1. Check a specific player's IP amx_ip PlayerName Output: [AMXX] PlayerName's IP address: 192.168.1.100 2. Check all Counter-Terrorist team IPs amx_ip @CT Output: [AMXX] IP addresses for CT team: 1) Player1 - 192.168.1.100 2) Player2 - 192.168.1.101 3) Player3 - 192.168.1.102 3. Check all Terrorist team IPs amx_ip @T Output: [AMXX] IP addresses for T team: 1) Player4 - 192.168.1.103 2) Player5 - 192.168.1.104 4. Check all connected players' IPs amx_ip * Output: [AMXX] IP addresses for all players: 1) Player1 - 192.168.1.100 2) Player2 - 192.168.1.101 3) Player3 - 192.168.1.102 4) Player4 - 192.168.1.103 5) Player5 - 192.168.1.104 Target Options Target Description Example <playername> Specific player by name or partial name amx_ip John @CT All Counter-Terrorist players amx_ip @CT @T All Terrorist players amx_ip @T * All connected players amx_ip * Access Requirements Admins must have the ADMIN_KICK flag to use this command The plugin respects immunity settings when targeting specific players Features ✅ Display individual player IP addresses ✅ Display team-based IP lists (CT/T) ✅ Display all connected players' IPs ✅ Shows IPs without ports (cleaner display) ✅ Immunity system support ✅ Error handling for invalid targets ✅ Console output for easy copy/paste Error Messages Error Cause Solution Invalid team. Use @CT or @T Wrong team syntax Use @CT or @T only Command output shows no results Player/team not found Verify the target exists Access denied message Insufficient permissions Ensure you have ADMIN_KICK flag Technical Details IP Display Format IPs are shown without port numbers (using flag 1 in get_user_ip()) Format: xxx.xxx.xxx.xxx Performance Minimal server impact Instant execution No background processes Compatibility AMX Mod X: 1.8.2 or higher Game: Counter-Strike 1.6 Platform: Windows & Linux Common Use Cases 1. Ban Evasion Detection Check if a suspicious player is using the same IP as a previously banned player: amx_ip SuspiciousPlayer 2. Multi-Account Detection Compare IPs of different players to detect multiple accounts: amx_ip Player1 amx_ip Player2 3. Team Balance Monitoring Check all team IPs to detect friends playing together: amx_ip @CT amx_ip @T 4. Server Audit Get a complete list of all connected IPs for logging: amx_ip * Privacy & Legal Notice ⚠️ Important: This plugin displays personal information (IP addresses). Server operators should: Comply with local data protection laws (GDPR, CCPA, etc.) Inform players that their IPs may be logged Only use this data for legitimate server administration Secure admin access to prevent misuse Never share player IPs publicly Changelog Version 1.1 Fixed critical bug where player names were overwritten by IPs Improved code structure and removed duplicate code Added proper error handling for invalid targets Updated to use modern AMXX practices (charsmax()) Added team validation for @CT and @T commands Improved console output formatting Better immunity handling with cmd_target() flags Version 1.0 (Original) Initial release Basic IP display functionality Support For issues, suggestions, or contributions: Website: steams.ro Forum: AMX Mod X community forums Credits Original Concept: $uicid3 Fixed & Updated by: steams.ro Community: AMX Mod X developers License This plugin is free to use and modify for personal and commercial servers. Please maintain author credits when redistributing. amx_ip.amxx amx_ip.sma
-
Overview A simple AMX Mod X plugin that allows players to toggle between first-person and third-person camera views in Counter-Strike. Author: steams.ro Version: 1.1 Features Toggle between normal (first-person) and third-person camera views Simple command interface (/cam) Works in both public and team chat Player state management (prevents camera change when dead) Automatic cleanup on player disconnect User feedback messages Commands say /cam - Toggle camera view (public chat) say_team /cam - Toggle camera view (team chat) Installation Compile the .sma file using AMX Mod X compiler Place the compiled .amxx file in addons/amxmodx/plugins/ Add the plugin name to addons/amxmodx/configs/plugins.ini Restart the server or change map Requirements AMX Mod X 1.8.2 or higher Engine module Improvements Made 1. Removed Unnecessary arrayset() Global boolean arrays are automatically initialized to false, making the manual reset redundant. 2. Added Connection Handlers client_connect() - Resets camera state when player joins client_disconnect() - Cleans up camera state when player leaves This prevents potential bugs where camera states persist incorrectly. 3. Added Alive Check The plugin now verifies if the player is alive before allowing camera changes, preventing issues with spectator mode or death states. 4. Simplified Toggle Logic Changed from verbose if-else to cleaner boolean negation: g_bEnabled[id] = !g_bEnabled[id]; 5. Added User Feedback Players now receive chat messages confirming their camera view changes. 6. Proper Return Values Added PLUGIN_HANDLED returns to properly signal that the command was processed. 7. Code Cleanup Removed AMXX-Studio auto-generated comments for cleaner code. Technical Details Global Variables g_bEnabled[33] - Boolean array tracking third-person state for each player (index 1-32) Functions plugin_init() - Registers plugin and commands plugin_precache() - Precaches required model for third-person view client_connect() - Initializes player camera state client_disconnected() - Cleans up player camera state setview() - Main command handler for camera toggling Usage Example Player types /cam in chat Plugin checks if player is alive If alive, toggles camera view Sends confirmation message to player Player can type /cam again to switch back Notes The plugin requires models/rpgrocket.mdl to be precached for third-person view functionality Camera state is per-player and persists until toggled or player disconnects Dead players cannot change camera view camera_view.sma camera_view.amxx
-
🎄 XMAS Sky Manager Day/Night v2.0 Automatic day/night sky rotation plugin for CS 1.6 servers 📖 Description XMAS Sky Manager Day/Night is an AMX Mod X plugin that automatically changes your server's skybox based on real-time hours. Set different skies for day and night, configure the transition hours, and let the plugin handle the rest! ✨ Features 🌤️ Separate day and night skies - Configure different skyboxes for daytime and nighttime ⏰ Customizable schedule - Set exact hours when day/night transitions occur 🔄 Automatic switching - Sky changes automatically every 60 seconds based on server time 📝 Detailed logging - All sky changes are logged in AMX logs 🎨 No downloads required - Uses built-in CS 1.6 skyboxes ⚙️ Easy configuration - Simple INI file with clear documentation 🚀 No map restart needed - Sky changes dynamically without changing maps 📥 Installation Compile the plugin: Upload xmas_sky_manager.sma to your web compiler or use AMX Mod X Studio Download the compiled .amxx file Upload the plugin: Place xmas_sky_manager.amxx in cstrike/addons/amxmodx/plugins/ Enable the plugin: Open cstrike/addons/amxmodx/configs/plugins.ini Add this line: xmas_sky_manager.amxx Restart your server or change map Configure (optional): Edit cstrike/addons/amxmodx/configs/sky_config.ini The file is auto-created with default settings on first run ⚙️ Configuration The plugin creates sky_config.ini in your configs folder with these settings: ; Sky to use during daytime day_sky snow ; Sky to use during nighttime night_sky space ; Hour when day starts (0-23, default: 7 = 7:00 AM) day_start_hour 7 ; Hour when night starts (0-23, default: 18 = 6:00 PM) night_start_hour 18 Default Schedule 07:00 - 18:00 (7 AM - 6 PM) = snow sky 18:00 - 07:00 (6 PM - 7 AM) = space sky 🎨 Available Skyboxes All these skyboxes are built into CS 1.6 - no additional downloads required! 🌞 Recommended for Daytime: snow - Cloudy/snowy sky (DEFAULT) desert - Clear desert sky 2desert - Alternate desert sky morningsnow - Morning with snow 🌙 Recommended for Nighttime: space - Cosmic space (DEFAULT) drksky - Dark cloudy sky black - Pitch black sky neb1 / neb6 - Colorful nebulas 🎭 Other Options: cliff - Rocky cliffs alien1 / alien2 / alien3 - Alien atmospheres xen9 / xen10 - Xen dimensions 📝 Configuration Examples Example 1: Extended Daylight (6 AM - 10 PM) day_sky desert night_sky drksky day_start_hour 6 night_start_hour 22 Example 2: Standard Business Hours (8 AM - 8 PM) day_sky snow night_sky space day_start_hour 8 night_start_hour 20 Example 3: Early Bird Schedule (5 AM - 11 PM) day_sky morningsnow night_sky neb6 day_start_hour 5 night_start_hour 23 Example 4: Always Night Theme day_sky drksky night_sky space day_start_hour 0 night_start_hour 0 🔧 How It Works On server start: Plugin reads sky_config.ini and applies the appropriate sky Every 60 seconds: Plugin checks current server time If time changed: Automatically switches between day/night sky Logging: Each sky change is recorded in AMX logs with timestamp Time Format Uses 24-hour format (0-23) Based on server's local time Hour 7 = 7:00 AM, Hour 18 = 6:00 PM 📊 Server Requirements ✅ AMX Mod X 1.8.2 or higher ✅ Counter-Strike 1.6 ✅ No additional files or dependencies 🐛 Troubleshooting Sky doesn't change Check that the plugin is loaded: amx_plugins in console Verify configuration file exists: configs/sky_config.ini Check AMX logs for errors: logs/L[date].log Sky changes but looks wrong Ensure sky names are spelled correctly (case-sensitive) Verify you're using valid CS 1.6 skybox names Check if custom skyboxes are properly installed (if using custom ones) Changes don't apply immediately Sky updates every 60 seconds, wait a moment Or change map/restart server for instant apply Check if hours are set correctly (0-23 range) 📜 Changelog Version 2.0 ✨ Added day/night sky rotation ⏰ Configurable transition hours 📝 Enhanced logging system 🌍 Full English documentation 🔄 Automatic sky switching without map restart Version 1.1 🎯 Initial release 🌤️ Single sky configuration 👨💻 Credits Author: alex - steams.ro Version: 2.0 License: Free to use and modify 💬 Support For issues, suggestions, or questions: Check the troubleshooting section above Review configuration examples Verify AMX logs for detailed error messages 📌 Quick Start Guide Install plugin → plugins/xmas_sky_manager.amxx Add to plugins.ini Restart server (config file auto-creates) Edit configs/sky_config.ini (optional) Enjoy automatic day/night skies! 🌅 Enjoy dynamic skies on your server! ☁️✨ xmas_sky_manager.amxx xmas_sky_manager.sma
-
Overview This AMX Mod X plugin provides a comprehensive gag system for Counter-Strike 1.6 servers. It automatically mutes players who use offensive language or advertisements, and allows admins to manually gag/ungag players. Version: 1.1 (Modified) Original Author: Cristi. C Modified by: steams.ro Requirements: AMX Mod X 1.8.2+, ColorChat, nVault Features 🔇 Auto-Gag System Automatically detects and gags players using offensive words or advertisements Customizable word list stored in gag_words.ini Configurable auto-gag duration 👮 Admin Commands Manual gag/ungag commands for administrators Protection for admins (optional) Configurable maximum gag duration 🔒 Restrictions When Gagged Cannot use text chat (say, say_team) Cannot use voice chat (voice speak) Optional name tag prefix (Gag#) 💾 Persistent Storage Gag status saved using nVault Players retain remaining gag time after disconnect/reconnect Saves based on IP address 📢 Notifications Colored chat messages for all gag/ungag events Custom sound effects Detailed logging to GagLog.log Installation Copy Files: Place the .sma file in addons/amxmodx/scripting/ Place the .amxx file in addons/amxmodx/plugins/ Add to plugins.ini: special_admin_gag.amxx Create Word List: Create gag_words.ini in addons/amxmodx/configs/ Add one offensive word per line Lines starting with # are comments Add Sound Files (Optional): Place sound files in sound/misc/ directory: gagged.wav - played when gagged ungagged.wav - played when ungagged Restart Server or type amx_reloadsound in console Configuration (CVARs) Add these to your amxx.cfg file: // Auto-gag duration in minutes when triggered by bad words amx_autogag_time 3 // Maximum gag duration limit in minutes amx_gag_minute_limit 300 // Time conversion (minutes to seconds) - don't change unless needed amx_gag_minute_in_seconds 60 // Add name tag when gagged (1 = yes, 0 = no) // IMPORTANT: Setting to 0 is recommended to avoid name persistence issues amx_gag_tagname 0 // Allow gagging admins (1 = yes, 0 = no) amx_admingag 0 // Maximum number of words to load from gag_words.ini amx_maxwords 200 // Chat tag prefix for plugin messages amx_gagtag "*" CVAR Details CVAR Default Description amx_autogag_time 3 Minutes of gag for auto-gag trigger amx_gag_minute_limit 300 Maximum minutes admins can set amx_gag_minute_in_seconds 60 Conversion rate (usually 60) amx_gag_tagname 1 Add "Gag#" prefix to player name (⚠️ See limitations) amx_admingag 0 Allow gagging administrators amx_maxwords 200 Max words in filter list amx_gagtag * Tag shown in chat messages ⚠️ Note about amx_gag_tagname: When enabled (1), adds "Gag#" prefix to gagged player names Known Issue: Players will keep this prefix after disconnect due to CS 1.6 saving names locally Recommendation: Set to 0 (disabled) on most servers to avoid this issue The plugin will still show gag status through chat messages Commands Console Commands (amx_) Gag a player: amx_gag <name> <minutes> [reason] <name> - Player name or part of name <minutes> - Duration in minutes (max: amx_gag_minute_limit) [reason] - Optional reason (for logging) Ungag a player: amx_ungag <name> <name> - Player name or part of name Chat Commands (/) Gag a player: /gag <name> <minutes> Ungag a player: /ungag <name> Required Access All commands require ADMIN_KICK flag by default. This can be changed in the source code: #define COMMAND_ACCESS ADMIN_KICK Word Filter Setup Create addons/amxmodx/configs/gag_words.ini: # Offensive Words List # One word per line # Lines starting with # are comments fuck shit bitch asshole # Add advertisements discord.gg free skins hack download Notes: Word matching is case-insensitive Partial matches trigger the filter (e.g., "fuck" matches "fucking") Be careful with common words to avoid false positives How It Works Auto-Gag Flow Player types a message in chat Plugin checks message against gag_words.ini If match found: Player is gagged for amx_autogag_time minutes Name tag added (if enabled) Voice chat disabled Notification sent to all players Event logged to GagLog.log Manual Gag Flow Admin uses amx_gag or /gag command Plugin validates: Target exists Target not already gagged Duration within limits Admin permissions (if target is admin) Gag applied with same restrictions as auto-gag Ungag Flow Admin uses amx_ungag or /ungag command Plugin validates target has gag Gag removed: Original name restored (if tag was added) Voice chat re-enabled Notification sent Auto-Ungag (Time Expiration) Timer checks every second For each gagged player: Decrements remaining time When time reaches 0: Auto-ungag applied Notification sent Event logged Persistence On Disconnect: Current gag status saved to nVault Saves: gagged status, remaining time, original name On Connect: Loads saved gag data from nVault If gag still active: Applies restrictions Shows remaining time Restores name tag File Structure cstrike/ ├── addons/ │ └── amxmodx/ │ ├── configs/ │ │ └── gag_words.ini # Offensive words list │ ├── data/ │ │ └── vault/ │ │ └── GagSystem.vault # Persistent storage │ ├── logs/ │ │ └── GagLog.log # Plugin log file │ ├── plugins/ │ │ └── special_admin_gag.amxx # Compiled plugin │ └── scripting/ │ └── special_admin_gag.sma # Source code └── sound/ └── misc/ ├── gagged.wav # Gagged sound └── ungagged.wav # Ungagged sound Logging All events are logged to addons/amxmodx/logs/GagLog.log: Log Entry Types: [AUTOGAG] - Player auto-gagged by filter [GAG] - Admin manually gagged player [UNGAG] - Admin manually ungagged player [AUTOUNGAG] - Gag expired automatically [EXIT] - Gagged player disconnected Example Log Entries: [AUTOGAG]<PlayerName><192.168.1.1><STEAM_ID> got AutoGag for swearing or advertising! [GAG]AdminName gagged <PlayerName><192.168.1.1><STEAM_ID> for <30> minutes [UNGAG]<AdminName> ungagged <PlayerName><192.168.1.1><STEAM_ID> [AUTOUNGAG]<PlayerName> received AutoUnGag! [EXIT]Gagged player <PlayerName><192.168.1.1><STEAM_ID> has disconnected! Troubleshooting Problem: Gag not persisting after disconnect Solution: Check that nVault is working: Verify addons/amxmodx/data/vault/GagSystem.vault exists Check file permissions (should be writable) Review error logs in addons/amxmodx/logs/ Problem: Words not being filtered Solution: Verify gag_words.ini exists in correct location Check amx_maxwords cvar isn't too low Ensure words don't have extra spaces or special characters Check server logs for loading errors Problem: Name tag stays after player disconnects Explanation: This is a CS 1.6 limitation, not a bug: When the plugin changes a player's name, CS 1.6 immediately saves it to the client's config.cfg The plugin cannot modify files on the player's computer When they disconnect, they keep the "Gag#" prefix in their saved name Solutions: Best: Set amx_gag_tagname 0 to disable name changing entirely Alternative: Players must manually change their name using console: name "YourName" Most professional servers don't use name tags for this reason Problem: Admin can't gag other admins Solution: Set amx_admingag 1 to allow admin gagging Problem: Commands not working Solution: Verify admin has ADMIN_KICK flag Check users.ini for proper admin setup Ensure plugin is loaded (amx_plugins in console) API Information Storage Format Data is stored in nVault with format: Key: <IP>-Gag Value: <gagged_status>#<remaining_minutes>#<original_name> Example: 192.168.1.1-Gag → 1#15#PlayerName Hook Points The plugin registers these hooks: say - Chat message monitoring say_team - Team chat monitoring Custom think entity for timer Permissions Default Access Level ADMIN_KICK - Required for all gag/ungag commands Modify Access Level Edit source code and recompile: #define COMMAND_ACCESS ADMIN_BAN // Change to desired flag Common flags: ADMIN_KICK (d) - Kick/ban access ADMIN_BAN (e) - Permanent ban ADMIN_SLAY (f) - Slay/harm players ADMIN_RCON (l) - RCON access Known Limitations IP-Based Storage: Gags are tied to IP addresses, not SteamID Players with dynamic IPs may evade gags VPN users can bypass Name Changes (Tag Feature): When amx_gag_tagname 1 is enabled, the "Gag#" prefix is added to player names IMPORTANT: When a gagged player disconnects, they will keep the "Gag#" prefix in their saved name This is a CS 1.6 limitation - the client saves the name to config.cfg immediately when changed The plugin cannot modify files on the client's computer Workaround: Players must manually change their name after reconnecting, or set amx_gag_tagname 0 to disable this feature Recommendation: Most servers disable name tags (amx_gag_tagname 0) and rely on chat messages instead Voice Chat: Requires voice to be enabled on server Performance: Large word lists (>500 words) may impact performance Future Enhancements Possible improvements for future versions: [ ] SteamID-based storage instead of IP [ ] Regex support for word patterns [ ] Web interface for word list management [ ] Statistics tracking (total gags, top offenders) [ ] Different gag levels (chat only, voice only, both) [ ] Temporary gag warnings before auto-gag [ ] Ban after X auto-gags Support & Credits Original Author: Cristi. C Modified by: steams.ro Modifications: Fixed critical save/load bugs Improved persistence system Enhanced error handling English translation Code optimization For support, issues, or suggestions: Check AlliedModders forums Review AMX Mod X documentation Consult server logs for errors Visit steams.ro for updates License This plugin is provided as-is for Counter-Strike 1.6 servers running AMX Mod X. Free to use and modify for your server needs. Changelog Version 1.1 (Modified by steams.ro) ✅ Fixed save function calling wrong player ID in CommandGag/CommandUngag ✅ Fixed name copying using proper copy() function instead of direct assignment ✅ Fixed register_plugin() to use VERSION constant and AUTHOR ✅ Added proper persistence on reconnect with full state restoration ✅ Improved LoadGagedPlayers to restore voice restrictions and name tags ✅ Added auto-ungag name restoration in Forward_GagThinker ✅ Added variable reset on disconnect/connect to prevent conflicts ✅ Improved error handling and code structure ✅ Translated all messages, comments, and documentation to English ✅ Optimized storage format to include original name Version 1.0 (Original by Cristi. C) Initial release Auto-gag system Manual gag/ungag commands nVault persistence Chat and voice restrictions amx_gag.amxx amx_gag.sma sound.zip
-
AFK Bomb Transfer - Complete Documentation 📋 General Information Plugin: AFK Bomb Transfer (Optimized) Version: 0.5 Author: steams.ro Platform: AMX Mod X Required Module: fakemeta 🎯 Description The plugin automatically transfers the bomb from inactive (AFK) terrorist players to the closest active teammate. This prevents situations where the bomb remains stuck with an AFK player, affecting the gaming experience. ✨ Features Main Functionality ✅ Automatic detection of AFK players carrying the bomb ✅ Automatic transfer to the closest active teammate ✅ Complete movement verification (X, Y, Z - including jumps) ✅ Informative HUD messages for team and new carrier ✅ Optimized task system (runs only when needed) ✅ C4 entity caching (improved performance) v0.5 Optimizations 🚀 Task runs only when someone has the bomb 🚀 Position checking on all 3 axes (X, Y, Z) 🚀 Eliminated duplicate get_players() calls 🚀 Cached C4 entity for fast lookup 🚀 Checks moved outside loops for efficiency 🚀 Restructured and detailed commented code Limitations The plugin does NOT work in the following situations: ❌ During freezetime (at round start) ❌ When bomb is being planted ❌ On maps without bomb sites (optional, see configuration) ⚙️ Installation Requirements AMX Mod X installed on server fakemeta module enabled in modules.ini Installation Steps Compile afkbombtransfer.sma with AMX Mod X compiler Copy afkbombtransfer.amxx to addons/amxmodx/plugins/ folder Add afkbombtransfer.amxx to addons/amxmodx/configs/plugins.ini Restart server or change map 🎛️ CVAR Configuration afk_bombtransfer_spawn afk_bombtransfer_spawn "7" Description: Maximum allowed AFK time (in seconds) for a player who received the bomb at spawn and never moved. Values: 0 or less = Plugin disabled for this check 1-60 = Recommended seconds Default: 7 seconds Example: If a player receives the bomb at spawn and remains AFK for 7 seconds without moving at all, the bomb will be transferred. afk_bombtransfer_time afk_bombtransfer_time "15" Description: Maximum allowed AFK time (in seconds) for any bomb carrier who moved at least once. Values: 0 or less = Plugin disabled for this check 1-120 = Recommended seconds Default: 15 seconds Example: If a player carrying the bomb stops and remains AFK for 15 seconds, the bomb will be transferred. 💬 HUD Messages For Terrorist Team (Green) Bomb transferred to "NewPlayerName" since "AFKPlayerName" is AFK Color: Green (RGB: 0, 255, 0) Position: Center-left (x: 0.35, y: 0.8) Duration: 7 seconds For New Carrier (Yellow) You got the bomb! Color: Yellow (RGB: 255, 255, 0) Position: Center-top (x: 0.42, y: 0.3) Duration: 7 seconds Channel: 3 🔧 Advanced Configuration Disabling Map Check If you want the plugin to run on ALL maps (including those without bomb sites): In source code, comment out the line: #define BOMB_MAP_CHECK Becomes: //#define BOMB_MAP_CHECK Then recompile the plugin. Changing Message Display Time In source code, modify the value: #define MSG_TIME 7.0 Example for 5 seconds: #define MSG_TIME 5.0 🔍 How It Works 1. AFK Detection The plugin checks every second the position (X, Y, Z) of each terrorist: If position changed → timer reset to 0 If position is the same → timer incremented Note: Also checks Z-axis, so jumps and falls reset the timer. 2. Carrier Verification When a player has the bomb: Plugin starts the check task Monitors specific AFK time (spawn vs normal) Checks if player is planting the bomb 3. Bomb Transfer When timer exceeds the set limit: Finds all active (non-AFK) terrorists Calculates distance from AFK carrier Selects the closest active player Forces bomb drop from AFK player Transfers backpack to new carrier Displays HUD messages 4. Active Optimizations Task stops automatically when: No bomb carrier exists Less than 2 terrorists It's freezetime Plugin disabled via CVAR 📊 Usage Examples Example 1: Competitive Server // Tight timings for fast action afk_bombtransfer_spawn "5" afk_bombtransfer_time "10" Example 2: Public/Casual Server // More relaxed timings afk_bombtransfer_spawn "10" afk_bombtransfer_time "20" Example 3: Fun/Zombie Server // Plugin disabled afk_bombtransfer_spawn "0" afk_bombtransfer_time "0" 🐛 Troubleshooting Plugin Not Working Check: ✅ fakemeta module is enabled in modules.ini ✅ Plugin is in plugins.ini ✅ CVARs are not set to 0 or negative values ✅ Map has bomb sites (if BOMB_MAP_CHECK is active) Bomb Not Transferring Possible causes: All terrorists are AFK It's freezetime Bomb is being planted Less than 2 terrorists on server Messages Not Appearing Check: hud_centerid in game (must not be 0) HUD settings in game 📝 Changelog v0.5 (2025) - steams.ro ✨ Added Z-axis checking (jumps/falls) 🚀 Optimized task (runs only when needed) 🚀 Eliminated duplicate get_players() calls 🚀 C4 entity caching 🚀 Checks moved outside loops 📝 Extended documentation and improved comments 🔧 Separate function for transfer 🎯 Separate event for bomb planting v0.4 Improved backpack transfer method Support for pcvar natives Code optimizations v0.3 Fakemeta instead of engine Option to disable map checking Improved backpack finding method v0.2 Format fixes Code optimizations Improved description v0.1 First release 📞 Support For issues, bugs, or suggestions: Website: steams.ro Forum: AMX Mod X section 📜 License This plugin is provided "as is" without warranties. 🙏 Credits Original Author: Wr0n (www.mortall.ro) v0.5 Optimizations: steams.ro Documentation generated for version 0.5 afkbombtransfer.sma afkbombtransfer.amxx
-
📋 Description Plugin for Counter-Strike 1.6 that allows players to launch fireworks at the end of winning rounds. Fireworks can be launched automatically or manually by pressing a button, providing a fun way to celebrate team victory. 📦 Installation 1. Required Files Place the compiled plugin in: cstrike/addons/amxmodx/plugins/ 2. Plugin Activation Add to addons/amxmodx/configs/plugins.ini: amx_fireworks.amxx 3. Translation File Place amx_fireworks.txt in: cstrike/addons/amxmodx/data/lang/ 4. Required Sprites The plugin uses the following sprites (included in CS 1.6): sprites/3dmflared.spr - firework model sprites/laserbeam.spr - colored trail sprites/fireworks.spr - explosion effect ⚙️ Configuration Method 1: Dedicated File (Recommended) Create addons/amxmodx/configs/amx_fireworks.cfg: // ======================================== // FIREWORKS PLUGIN - CONFIGURATION // ======================================== // Enable/Disable plugin // 0 = Disabled | 1 = Enabled amx_fireworks_enable "1" // Fireworks for admins only // 0 = Everyone | 1 = Admins only amx_fireworks_admin_only "0" // Required admin flag (if admin_only = 1) // Available flags: a-z (example: "b" = reservation flag) amx_fireworks_admin_flag "b" // Fireworks launch type // 0 = Automatic launch (every 0.6 seconds) // 1 = E button (IN_USE) // 2 = Attack/shoot button (IN_ATTACK) - RECOMMENDED amx_fireworks_type "2" // Chat messages // 0 = Disabled | 1 = Enabled amx_fireworks_message_enable "1" Then add to addons/amxmodx/configs/amxx.cfg: exec amx_fireworks.cfg Method 2: Direct in amxx.cfg Add the CVars directly at the end of addons/amxmodx/configs/amxx.cfg 🎮 How It Works When Does It Activate? Fireworks become available when a round ends Only the winning team can launch fireworks Automatically disabled at the start of the next round Launch Modes Mode 0 - Automatic amx_fireworks_type "0" Fireworks launch automatically from player's position Interval: 0.6 seconds between each firework Players don't need to do anything Mode 1 - E Button (IN_USE) amx_fireworks_type "1" Players press E key to launch Firework launches in the direction player is looking Full control over launch timing Mode 2 - Attack (IN_ATTACK) ⭐ RECOMMENDED amx_fireworks_type "2" Players shoot (left click) to launch Firework launches in the direction player is looking Most intuitive usage mode 🎨 Visual Effects Firework Sprite: 3dmflared.spr (glowing orb) Speed: 700 units/second Trail: Random colored laser (random RGB) Trail Duration: 0.9 seconds Explosion Sprite: fireworks.spr Position: +200 units above impact point Random Offset: ±5 units on X/Y axis Size: 15 Brightness: 200 👥 Admin Restrictions Enable Restriction amx_fireworks_admin_only "1" Set Flag amx_fireworks_admin_flag "b" Common Flags: a - immunity (kick/ban protection) b - reservation (reserved slot) c - amx_kick command d - amx_ban command e - amx_slay command z - user (basic user access) Example: For admins with full access, use flag "a" or "z" 💬 Chat Messages Displayed Messages: On Activation (round end): [Fireworks] Fireworks are now available! [Fireworks] Press IN_ATTACK to launch! (or E (IN_USE) for mode 1) On Deactivation (round start): [Fireworks] Fireworks have been disabled! Disable Messages: amx_fireworks_message_enable "0" 🔧 Admin Commands (Console) Change Settings Live: amx_cvar amx_fireworks_enable 1 amx_cvar amx_fireworks_admin_only 0 amx_cvar amx_fireworks_type 2 amx_cvar amx_fireworks_message_enable 1 Check Current Settings: amx_cvar amx_fireworks_enable 📝 Default Values If you DON'T configure CVars, the plugin uses: CVar Value Description amx_fireworks_enable 1 Enabled amx_fireworks_admin_only 0 Everyone amx_fireworks_admin_flag "b" Reservation flag amx_fireworks_type 2 Attack launch amx_fireworks_message_enable 1 Messages enabled 🛠️ Technical Requirements Required AMXX Modules: amxmodx - Core module fakemeta - Entity manipulation Check Modules: In server console: amxx modules Should show: [AMXX] Module: fakemeta loaded AMXX Version: Minimum: AMX Mod X 1.8.2 Recommended: AMX Mod X 1.8.3+ (for client_print_color) 🐛 Troubleshooting Fireworks Don't Appear ✅ Check: Plugin is in plugins.ini and is activated amx_fireworks_enable is set to 1 fakemeta module is loaded Sprites exist in sprites/ folder Only Admins Can Use (Unwanted) ✅ Solution: amx_cvar amx_fireworks_admin_only 0 Messages Don't Appear ✅ Check: amx_fireworks_message_enable "1" amx_fireworks.txt file exists in data/lang/ Fireworks Won't Launch with Button ✅ Check: Are you on the winning team? Has the round ended? Does the type setting (amx_fireworks_type) match the button pressed? 📊 Performance Server Impact: Minimal - uses native CS 1.6 sprites Temporary entities - automatically deleted after impact Optimized - autorelease interval prevents spam Recommendations: For servers with 20+ players: use type "1" or "2" (manual) For small servers: type "0" (automatic) works perfectly 📜 License and Credits Author: [P]erfec[T] cr[@]s[H] Version: 1.3 Compatibility: Counter-Strike 1.6 / AMX Mod X 🎯 Recommended Configurations Maximum Fun (Public Servers): amx_fireworks_enable "1" amx_fireworks_admin_only "0" amx_fireworks_type "2" // Attack launch amx_fireworks_message_enable "1" Automatic Show: amx_fireworks_enable "1" amx_fireworks_admin_only "0" amx_fireworks_type "0" // Automatic launch amx_fireworks_message_enable "1" VIP/Premium Only: amx_fireworks_enable "1" amx_fireworks_admin_only "1" // Admins only amx_fireworks_admin_flag "b" // Reservation flag amx_fireworks_type "2" amx_fireworks_message_enable "1" 📞 Support For questions or issues: Check this documentation Test with default settings Check logs: addons/amxmodx/logs/ Example to check if plugin is active: amxx list Should show: amx_fireworks.amxx 🎆 Have fun with the fireworks! 🎆 round end fireworks.zip
-
Plugin Information Plugin Name: Round End Sounds Version: 0.0.2 Author: steams.ro Game: Counter-Strike 1.6 Mod: AMX Mod X Description This plugin creates a cinematic experience at the end of each round, inspired by Counter-Strike Online (CSO). It plays a random music track and displays a custom viewmodel animation for all alive players when a round ends. Features ✓ Multiple random music tracks at round end ✓ Custom viewmodel animation for alive players ✓ Automatic sound precaching ✓ Easy to add/remove songs ✓ Synchronized for all players Installation Compile the plugin (.sma file) Place the compiled .amxx file in: addons/amxmodx/plugins/ Add the plugin name to: addons/amxmodx/configs/plugins.ini Place the viewmodel file in: cstrike/models/ v_round_end.mdl Place the sound files in: cstrike/sound/round_end/ end_sound1.mp3 end_sound2.mp3 end_sound3.mp3 etc. Restart the server File Structure cstrike/ ├── addons/amxmodx/plugins/ │ └── round_end_sounds.amxx ├── models/ │ └── v_round_end.mdl └── sound/round_end/ ├── end_sound1.mp3 ├── end_sound2.mp3 ├── end_sound3.mp3 ├── end_sound4.mp3 └── end_sound5.mp3 How to Add More Songs Simply add new lines to the szSounds array in the source code: new const szSounds[][] = { "round_end/end_sound1.mp3", "round_end/end_sound2.mp3", "round_end/victory_theme.mp3", // New song "round_end/epic_music.mp3" // New song }; The plugin will automatically: Count the number of songs Precache all of them Select randomly at each round end How It Works At round end, the plugin detects the "Round_End" event It randomly selects one music track from the list For all connected players: Stops any currently playing sounds Plays the selected music track For alive players only: Changes the viewmodel to v_round_end.mdl Plays animation 0 of the model Sets idle time to 5 seconds Note: All players hear the same randomly selected song during that round. Technical Details Uses FakeMeta module for entity manipulation Random selection using random() function Static allocation for viewmodel string (optimization) pev_viewmodel2 for first-person model display SVC_WEAPONANIM message for animation synchronization Requirements AMX Mod X 1.8.2 or higher FakeMeta module Counter-Strike 1.6 Example Behavior Round 1 ends → Randomly selects song 3 → All players hear end_sound3.mp3 Round 2 ends → Randomly selects song 1 → All players hear end_sound1.mp3 Round 3 ends → Randomly selects song 5 → All players hear end_sound5.mp3 Round 4 ends → Randomly selects song 2 → All players hear end_sound2.mp3 Credits Original concept: Dias Pendragon, Freedo.m, OverGame Multiple songs system: steams.ro Support For support or questions, visit: steams.ro Last updated: November 2025 round_end_sounds.sma round_end_sounds.amxx v_round_end.mdl sound.zip
-
📋 Plugin Information Name: Weapons Menu Version: 1.1 Author: Steams.ro Description: This plugin adds a weapons menu at spawn with temporary save option for Counter-Strike servers. ✨ Features 🎯 Core Features Automatic spawn menu - Players receive a weapons menu when they spawn 3 weapon loadouts - AK-47, M4A1, or AWP with full equipment Temporary save system - Players can save their weapon choice for the current session Manual menu access - Open the menu anytime with /guns command Free weapons - All weapons are completely free, no money deduction CT defuse kit - Counter-Terrorists automatically receive defuse kit 🔫 Weapon Loadouts Each loadout includes: Primary weapon (AK-47 / M4A1 / AWP) Secondary weapon (Desert Eagle) Grenades: 1x HE Grenade 2x Flashbang 1x Smoke Grenade Full armor (Kevlar + Helmet) Maximum ammunition for all weapons 🎮 How It Works First Spawn Player spawns for the first time Menu appears automatically with 3 weapon options Player selects their preferred loadout A second menu asks: "Save this choice?" Yes → Weapon will be given automatically at next spawn No → Menu will appear again at next spawn After Saving Player receives saved weapon automatically at each spawn No menu appears (unless they use /guns) Can change weapon anytime with /guns command Can reset saved weapon from the menu On Disconnect All saved preferences are cleared When reconnecting, player starts fresh (menu appears again) 💬 Commands Command Description Access /guns Opens the weapons menu manually All players say /guns Opens the weapons menu (public chat) All players say_team /guns Opens the weapons menu (team chat) All players 📝 Menu Options Main Menu: [MENU] Choose your weapons • AK-47 + Deagle & Nades • M4A1 + Deagle & Nades • AWP + Deagle & Nades (blank line) • Reset saved weapon (appears only if weapon is saved) Save Menu: [SAVE WEAPON] Save this choice? Yes - Save this weapon No - Don't save 🔔 Automatic Messages The plugin displays an informational message every 30 seconds: Type /guns to open the weapons menu! This reminds players they can access the menu anytime. ⚙️ Technical Details Requirements AMX Mod X 1.9.0 or higher ReAPI module Counter-Strike 1.6 or CS:GO (with ReGameDLL) Includes Required #include < amxmodx > #include < reapi > Storage Type: Temporary (session-based) Persistence: No database, memory only Duration: Until player disconnects Ammunition Provided Weapon Backup Ammo AK-47 / M4A1 / AWP 90 bullets Desert Eagle 35 bullets HE Grenade 1 grenade Flashbang 2 grenades Smoke Grenade 1 grenade 🛡️ Security & Validation Player Checks The plugin verifies: ✅ Player is alive ✅ Player is not a bot ✅ Player is not HLTV ✅ Valid player connection Menu Safety Menu automatically closes after 90 seconds Menu is destroyed after selection No memory leaks 🎨 Customization Change Announcement Interval Modify line in plugin_init(): set_task( 30.0, "ShowInfoMessage", .flags = "b" ); // ^^^^ Change this number (in seconds) Add More Weapons Add new menu items in ShowWeaponsMenu(): menu_additem( menu, "\r• \wYour Weapon \d+\w Deagle \d&\w Nades\w" ); Then add the case in Weapons_Handler(): case 3: give_weapons( id, "weapon_name", WEAPON_ID ); Modify Loadouts Edit give_weapons() function: rg_give_item( id, "weapon_name", GT_REPLACE ); rg_set_user_bpammo( id, WEAPON_ID, amount ); 🐛 Troubleshooting Menu doesn't appear Check if player is alive Verify ReAPI is installed Check if another plugin blocks menus Weapons not given Ensure ReAPI module is loaded Check server logs for errors Verify weapon names are correct Save doesn't work This is normal - save is temporary only Preferences clear on disconnect This is by design, not a bug 📊 Weapon Stats Reference Primary Weapons Weapon Damage Fire Rate Magazine Price (normally) AK-47 High Fast 30 $2500 M4A1 Medium-High Fast 30 $3100 AWP Very High Slow 10 $4750 Note: In this plugin, all weapons are FREE! 📞 Support For issues or suggestions: Author: Steams.ro Version: 1.1 Check server console for error messages Verify all requirements are installed 📜 License & Credits Created by: Steams.ro Plugin Type: Free & Open Source Compatible with: ReAPI-based servers 🔄 Changelog Version 1.1 ✅ Added temporary save system ✅ Added /guns command ✅ Added automatic informational messages ✅ Added reset option in menu ✅ Removed permanent storage (nVault) ✅ English translation ✅ Improved menu design Version 1.0 🎉 Initial release 🎯 Basic weapons menu at spawn 🔫 3 weapon loadouts 🛡️ Automatic equipment distribution Last Updated: November 10, 2025 weapons_menu.amxx weapons_menu.sma
-
Custom Player Models - Christmas Edition Documentation 📋 About Plugin Name: Custom Player Models (Christmas Edition) Version: 2.2.0 Author: steams.ro Compatibility: AMX Mod X 1.8.2+, Counter-Strike 1.6 Description Plugin that allows players to choose custom skins based on team (CT/T) and gender (boys/girls). Access to skins is controlled through separate lists for girls and boys. This Christmas Edition uses Santa and Grinch models as default skins for players not in any list, with an easy toggle system. 🎯 Features ✅ Separate list system - girls.ini and boys.ini ✅ 5 skins for each category - CT and T ✅ Interactive menu - /skin or /skins command in chat ✅ Instant skin application - Changes apply immediately when alive ✅ Conflict detection - players in both lists get default skins ✅ Automatic file creation - .ini files are created automatically if missing ✅ Multiple identification - support for Name and SteamID 🎅 Christmas toggle - Easy ON/OFF for Santa & Grinch default skins 🎄 What's Different in Christmas Edition? Standard Version (v2.0.0): Players not in lists → CS 1.6 default skins (arctic, guerilla, leet, etc.) Requires 20 models total No Christmas features Christmas Edition (v2.2.0): Players not in lists → Santa (CT) and Grinch (T) OR CS defaults (toggleable) Requires 22 models total (20 custom + 2 Christmas) Instant skin application when alive CVAR toggle - christmas 0/1 to enable/disable themed defaults Perfect for holiday servers or themed events 📦 Installation 1. Compile Plugin amxxpc custom_player_models.sma 2. Copy Files addons/amxmodx/plugins/custom_player_models.amxx addons/amxmodx/configs/girls.ini (created automatically) addons/amxmodx/configs/boys.ini (created automatically) 3. Enable Plugin Add to addons/amxmodx/configs/plugins.ini: custom_player_models.amxx 4. Configure CVAR (Optional) Add to addons/amxmodx/configs/amxx.cfg: christmas 1 // 1 = Santa/Grinch ON, 0 = CS defaults (default is 0) 5. Install Models Copy all models in the correct structure (see below). 📁 Required Model Structure Boys Models (10 models) cstrike/models/player/boy_ct_1/boy_ct_1.mdl cstrike/models/player/boy_ct_2/boy_ct_2.mdl cstrike/models/player/boy_ct_3/boy_ct_3.mdl cstrike/models/player/boy_ct_4/boy_ct_4.mdl cstrike/models/player/boy_ct_5/boy_ct_5.mdl cstrike/models/player/boy_t_1/boy_t_1.mdl cstrike/models/player/boy_t_2/boy_t_2.mdl cstrike/models/player/boy_t_3/boy_t_3.mdl cstrike/models/player/boy_t_4/boy_t_4.mdl cstrike/models/player/boy_t_5/boy_t_5.mdl Girls Models (10 models) cstrike/models/player/girl_ct_1/girl_ct_1.mdl cstrike/models/player/girl_ct_2/girl_ct_2.mdl cstrike/models/player/girl_ct_3/girl_ct_3.mdl cstrike/models/player/girl_ct_4/girl_ct_4.mdl cstrike/models/player/girl_ct_5/girl_ct_5.mdl cstrike/models/player/girl_t_1/girl_t_1.mdl cstrike/models/player/girl_t_2/girl_t_2.mdl cstrike/models/player/girl_t_3/girl_t_3.mdl cstrike/models/player/girl_t_4/girl_t_4.mdl cstrike/models/player/girl_t_5/girl_t_5.mdl 🎅 Christmas Default Models (2 models) - REQUIRED! cstrike/models/player/santa25xmas/santa25xmas.mdl cstrike/models/player/grinch14xmas/grinch14xmas.mdl IMPORTANT: Each folder must also contain the .t file (texture) if the model uses it! The Christmas models are REQUIRED - server won't start without them! Even if christmas 0, the models must exist on server Complete example: models/player/santa25xmas/ ├── santa25xmas.mdl └── santa25xmas.t (optional, if exists) Total Models Required: 22 10 boys models 10 girls models 2 Christmas default models ⚙️ Configuration CVAR Settings Add to addons/amxmodx/configs/amxx.cfg: // Christmas skins toggle christmas 1 // 0 = OFF (CS defaults), 1 = ON (Santa/Grinch) Default: christmas 0 (OFF - CS default skins) Behavior: christmas 0 - Players not in lists get CS 1.6 default skins christmas 1 - Players not in lists get Santa (CT) / Grinch (T) To change during game: // In server console or RCON christmas 1 amx_cvar christmas 1 File: girls.ini # ---[ Girls List ] --- # # -> Syntax : "Name/Steam Id" # -> Example : "PlayerName" "STEAM_0:1:12345678" "Maria" "Ana_Gaming" File: boys.ini # ---[ Boys List ] --- # # -> Syntax : "Name/Steam Id" # -> Example : "PlayerName" "STEAM_0:0:87654321" "John" "ProPlayer123" Adding Rules: ✅ You can use player name or SteamID ✅ Put each entry in quotes: "Name" ✅ One entry per line ✅ Lines starting with # or ; are comments ⚠️ Names are case-sensitive (Maria ≠ maria) 🎮 Usage For Players Commands: /skin - Opens skin selection menu /skins - Opens skin selection menu (same as /skin) Both commands do the same thing - open the interactive menu! How It Works: On connect - you receive a message if you have access to skins Type /skin or /skins - menu opens with 5 options Choose skin - press corresponding key (1-5) If alive - skin changes instantly! If dead - skin will change on next spawn Default users - get Santa (CT) or Grinch (T) if christmas 1, or CS defaults if christmas 0 Example Messages: [Skins] You have access to custom skins! Type /skin or /skins for menu. [Skins] Skin 3 applied instantly! [Skins] Skin 2 selected! You will get it on next spawn. [Skins] You don't have access to custom skins! [Skins] You are in both lists! You will get the default skin. 🔧 For Administrators Toggle Christmas Skins Method 1 - Config File (Permanent): Edit addons/amxmodx/configs/amxx.cfg: christmas 1 // Enable Santa/Grinch Method 2 - Console (Temporary): christmas 1 // Enable christmas 0 // Disable Method 3 - RCON: rcon christmas 1 Adding Players Method 1 - Manual: # Edit .ini files directly nano addons/amxmodx/configs/girls.ini Method 2 - Through Server: # Stop server # Edit files # Restart server OR reload map Reload Lists To reload lists without restart: amx_map de_dust2 (or any map) Console Verification After server start, check: [CUSTOM-MODELS] Loaded X girls [CUSTOM-MODELS] Loaded Y boys To check CVAR status: christmas Troubleshooting ❌ Error: "Model santa25xmas not found" Cause: Christmas default model is missing Solution: Install santa25xmas.mdl and grinch14xmas.mdl in correct folders ❌ Error: "Model boy_ct_1 not found" Cause: Model is missing from correct folder Solution: Verify all 22 models are in the correct location ❌ Christmas skins not working Possible causes: christmas 0 in config (check with christmas command) Models santa25xmas/grinch14xmas are missing Plugin not loaded properly Solution: christmas 1 // Enable in console amx_map de_dust2 // Reload map ❌ Player doesn't receive custom skin Possible causes: Not in girls.ini or boys.ini (will get defaults) Name/SteamID is misspelled In both lists (conflict - gets defaults) Selected model is missing ❌ Menu doesn't open Cause: Player doesn't have access (not in lists) Note: This is normal - only listed players can choose custom skins ❌ Skin doesn't change instantly Possible causes: Player is dead (will apply on spawn - this is normal) Model file is missing Plugin conflict with another skin plugin 📊 Behavior Skin Priority: In girls.ini AND boys.ini → Default skins (conflict) In girls.ini → Skins girl_ct_X / girl_t_X In boys.ini → Skins boy_ct_X / boy_t_X In no list → Based on christmas CVAR: christmas 1 → Santa (CT) / Grinch (T) 🎅 christmas 0 → CS default skins On Connect: Selected skin resets to Skin 1 (first model) Player must choose again with /skin or /skins Non-listed players automatically get default skins based on CVAR On Spawn: Automatically applies selected skin If you switch team (CT↔T), you get the corresponding model Non-listed players: Based on christmas CVAR setting When Alive: Selecting a skin from menu applies it instantly No need to wait for respawn! 🎨 Customization Change Christmas Models In code, modify these lines: new const SANTA_MODEL[] = "santa25xmas"; new const GRINCH_MODEL[] = "grinch14xmas"; Example: For different Christmas models: new const SANTA_MODEL[] = "my_custom_santa"; new const GRINCH_MODEL[] = "my_custom_grinch"; Change Number of Skins In code, modify the line: #define MAX_MODELS 5 Example: For 10 skins per category: #define MAX_MODELS 10 WARNING: You must have all models (boy_ct_1 through boy_ct_10, etc.) Change Commands In code, modify: register_clcmd("say /skins", "CMD_SkinsMenu"); register_clcmd("say /skin", "CMD_SkinsMenu"); Example: For /models: register_clcmd("say /models", "CMD_SkinsMenu"); Change CVAR Name In code, modify: g_christmas_skins = register_cvar("christmas", "0"); Example: For xmas_mode: g_christmas_skins = register_cvar("xmas_mode", "0"); Change Messages Search in code for [Skins] and modify texts: client_print(id, print_chat, "[Skins] Your custom message here"); 📝 Usage Examples Example 1: Year-Round Server # amxx.cfg christmas 0 # Use CS defaults most of the time # During December, change to: christmas 1 # Enable festive atmosphere! Example 2: Always Festive # amxx.cfg christmas 1 # Always use Santa/Grinch for non-VIP # girls.ini & boys.ini - VIP members "VIP_Member1" "VIP_Member2" Example 3: Mixed Community # Some players get custom models # Regular players can enjoy either CS classics or Christmas theme # Admin controls with simple CVAR toggle ❓ Frequently Asked Questions (FAQ) Q: Can I use names with spaces? A: Yes! Example: "Name With Spaces" Q: What happens if I'm not in any list? A: You get Santa/Grinch if christmas 1, or CS defaults if christmas 0. Q: Can I change skins while alive? A: Yes! The skin changes instantly when you select from menu. Q: Do I need Christmas models if I set christmas 0? A: Yes! The models must exist on server even if not used. This is required for plugin startup. Q: Can I have more than 5 skins? A: Yes, modify #define MAX_MODELS and add the models. Q: Is the skin saved between reconnects? A: No, on each connect you start with Skin 1. Q: Can I change the Christmas models to other themes? A: Yes, modify the SANTA_MODEL and GRINCH_MODEL constants in code and use your own models. Q: What happens if a model is missing? A: Server won't start and shows error in console. Q: Can I temporarily disable the plugin? A: Yes, comment the line in plugins.ini with // or ; Q: How do I switch between Christmas and normal mode? A: Simply change christmas CVAR: christmas 1 for Santa/Grinch, christmas 0 for CS defaults. 🆚 Version Comparison Feature Standard v2.0.0 Christmas v2.2.0 Custom skins (boys/girls) ✅ ✅ Menu system ✅ ✅ Instant skin change ❌ ✅ Default skins CS 1.6 only Toggle: CS or Christmas CVAR control ❌ ✅ christmas Total models 20 22 Best for Year-round simple Flexible + themed Commands /skins only /skin + /skins Choose based on: Standard: Basic functionality, CS defaults only Christmas: Advanced features, instant change, toggleable themes 🐛 Bug Reporting For bugs or suggestions, contact: Website: steams.ro Check: AMX Mod X version and CS 1.6 Include: Console logs and reproduction steps 📜 License & Credits Developed by: steams.ro Version: 2.2.0 (Christmas Edition) Date: November 07, 2025 Free plugin for Counter-Strike community. Model Credits Custom models: By respective creators Santa/Grinch models: Ensure you have proper rights to use these models 🔄 Changelog v2.2.0 - Christmas Edition (November 07, 2025) ✨ Added instant skin application when alive ✨ Added /skin command (same as /skins) 🎅 Added christmas CVAR for easy toggle (default: OFF) 🎄 Santa/Grinch can now be disabled via CVAR 💬 Improved player feedback messages 🔧 Simplified CVAR name from christmas_skins to christmas v2.1.0 - Christmas Edition (November 07, 2025) 🎅 Added Santa model as CT default 🎄 Added Grinch model as T default ✨ All features from v2.0.0 included v2.0.0 (November 07, 2025) ✨ Complete interactive menu system ✨ Support for 5 skins per category ✨ /skins command in chat ✨ Automatic conflict detection ✨ Informative messages for players v1.0.0 (Original) 🎉 Initial version with fixed skins 📁 girls.ini/boys.ini list system Happy Holidays and thank you for using Custom Player Models - Christmas Edition! 🎅🎄🎮 Quick Setup: Install 22 models Add christmas 1 to amxx.cfg (optional, default is 0) Add players to girls.ini/boys.ini Players use /skin to choose! Toggle festive mode anytime with christmas CVAR! models.zip custom_player_models.amxx custom_player_models.sma
-
Salut, ti-am creat si categoriile. Multa bafta cu serverul.
- 1 reply
-
- 1
-

-
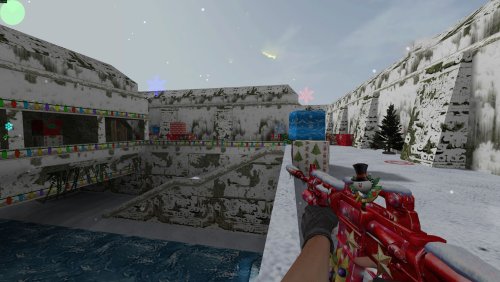
Version 1.0.0
0 downloads
unknown details -
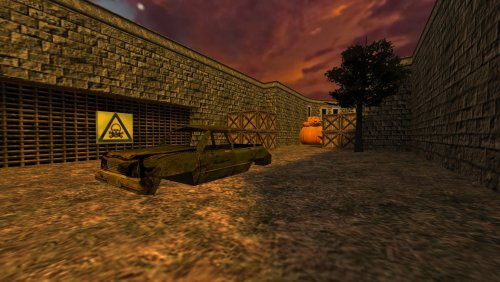
Version 1.0.0
0 downloads
Map created by Daniel Marcu. danielmarcu.com
